
Follow the below steps to Setup the Environment in Visual Studio
- Download C# Library from below URL:

2. Open Visual Studio Click on New -> Project ,Select Console Application

3 . Give the Meaningful name for the project
4 . On Solution Explorer Add the downloaded C# Library, See the below images to add reference library.
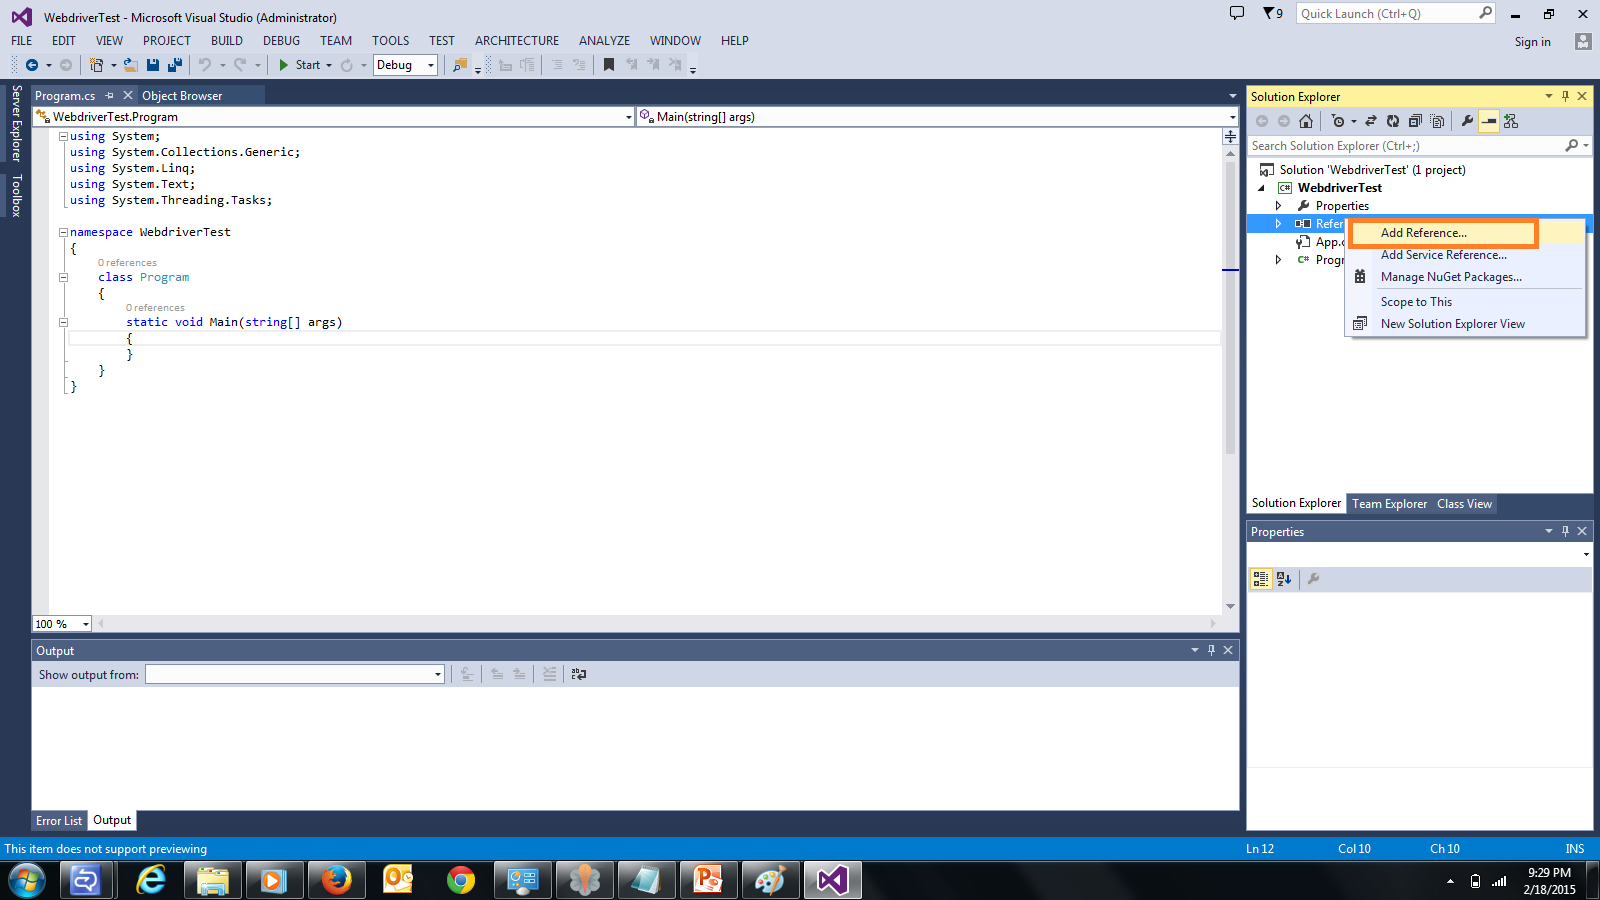
Right click on References from solution explorer
Click on Browser.

Navigate to the C# Library Downloaded Folder

Open on net40

Select all .dll files

After Selecting .dll files your screen looks like below

Thats it,
After that add the below namespaces
using OpenQA.Selenium;
using OpenQA.Selenium.Chrome;
using OpenQA.Selenium.Chrome;
Note : In the below example i used ChromeDriver
Source Code :
using System;
using System.Collections.Generic;
using System.Linq;
using System.Text;
using System.Threading.Tasks;
using OpenQA.Selenium;
using OpenQA.Selenium.Chrome;
namespace WebdriverTest
{
class Program
{
static void Main(string[] args)
{
IWebDriver driver = new ChromeDriver(@"C:\my\path\to\chromedriver
\directory");
driver.Navigate().GoToUrl("http://automationplace.blogspot.com/");
driver.Close();
}
}
}
Run the program.
Thats it.
Hope you like this post.
Hit Like button on facebook.
Ideal for beginners .. Good post
ReplyDelete